Burda 4 2010 116 shirt dress

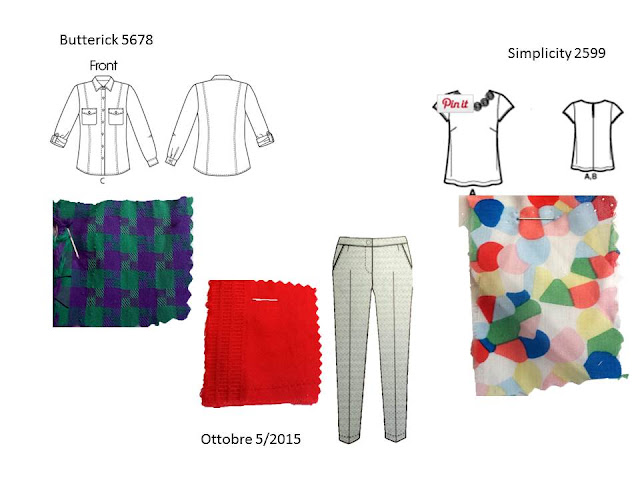
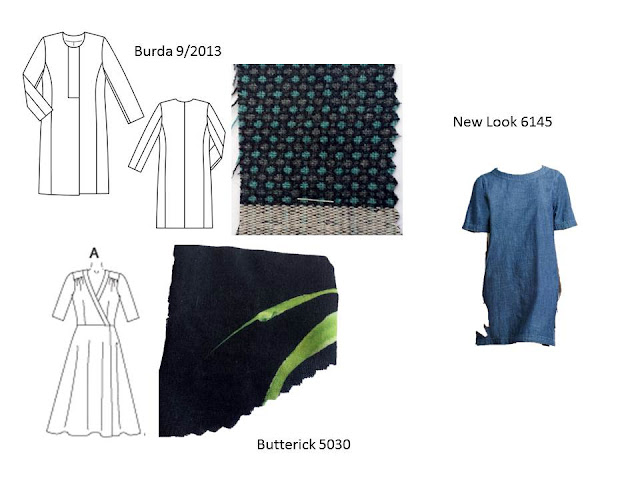
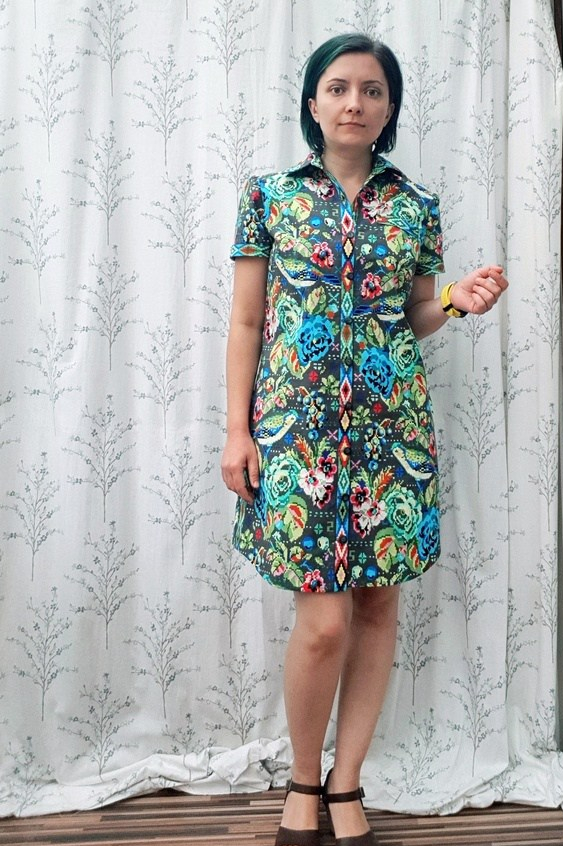
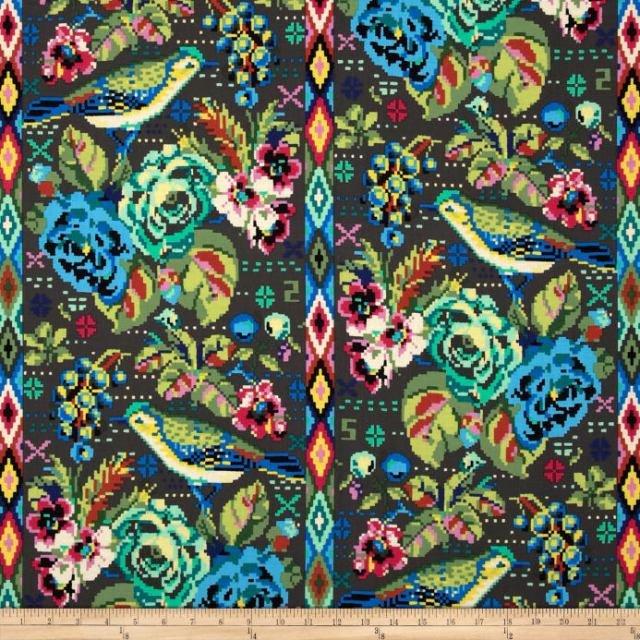
Pattern Review had a shirt dress contest recently and I had the perfect fabric for one. I bought this gorgeous Amy Butler print almost 3 years ago, planning to make a McCalls 6696.  My plans rarely turn into reality, so the fabric has waited patiently in a cupboard. Which is not too bad, because I don’t want a M6696 anymore, I wanted something more relaxed like S8014.

05

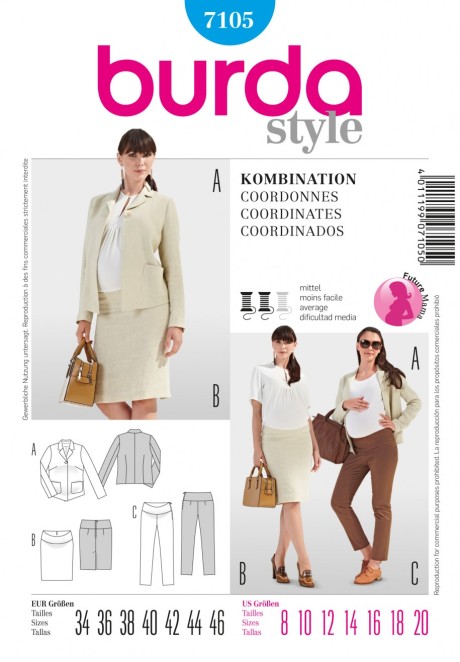
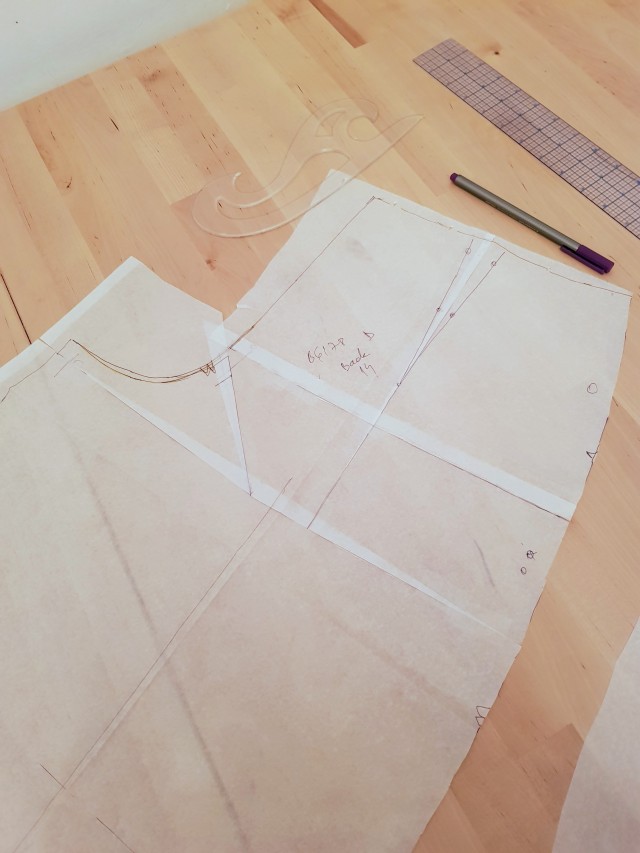
I didn’t want to bother toiling the Simplicity pattern so I started with a Burda pattern which I altered slightly to look more like the Simplicity one.

I used 38 for neck, collar, armholes and 40 from the bust down. I usually trace 36 for shoulders but the pattern started at 38. It’s still good and if I ever get to make some shirts using this pattern I will probably leave it as it is.

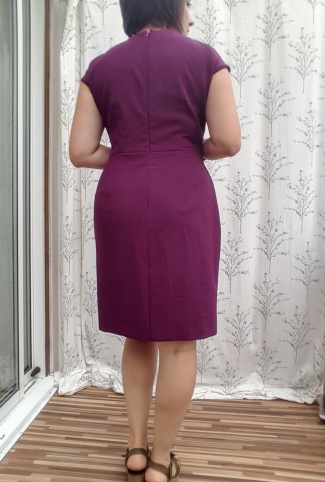
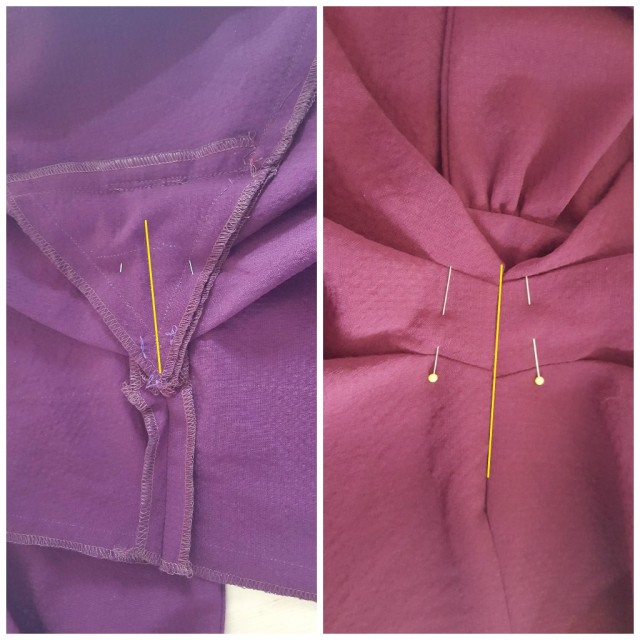
I did a 1/2″ forward shoulder and for the sway back I just shaved a 1/4 wedge of the back and yoke seam at the centre, tapering to nothing at the armscye. I shaved another 1/4 on the yoke on the armscye side both front and back for sloping shoulder (this actually brought the back yoke seam to the original shape) . This change made my armhole smaller and I forgot to remove some from the sleeve cap, so I had A LOT of sleeve to ease in


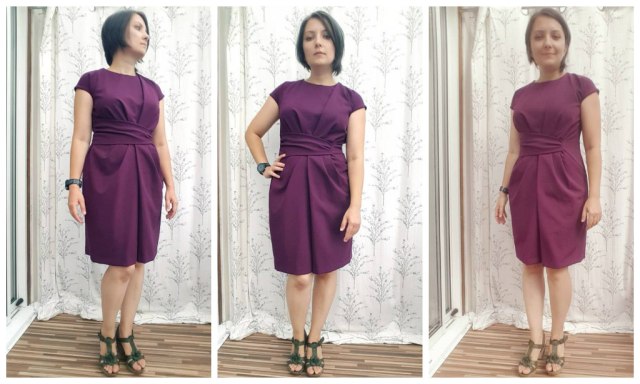
I made the skirt 2.5″ shorter than the pattern and faced the hem with a 3″ wide facing. The pattern included instructions for a D ring belt, I like the idea of having more than just a tie  belt/sash so I made one too. I interfaced both sides and did 4 rows of top stitching to give it more body. I like the dress with  or without a belt and I thin it will work with any shop bought belt since there are so many colours in the print.

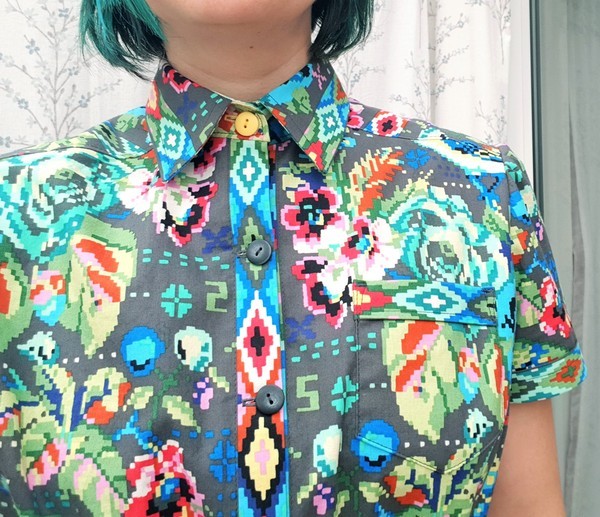
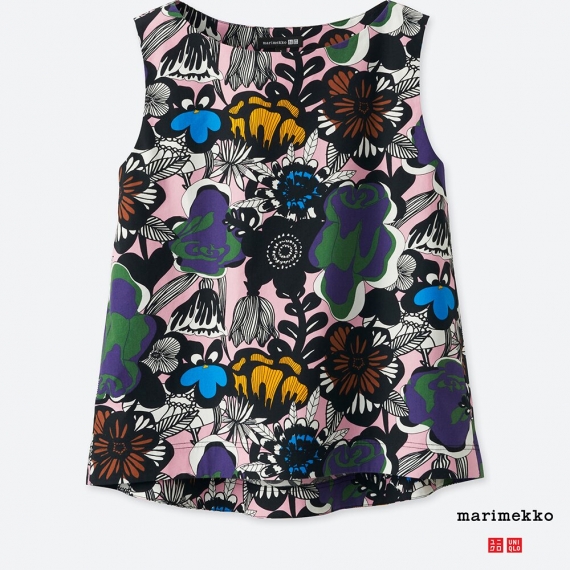
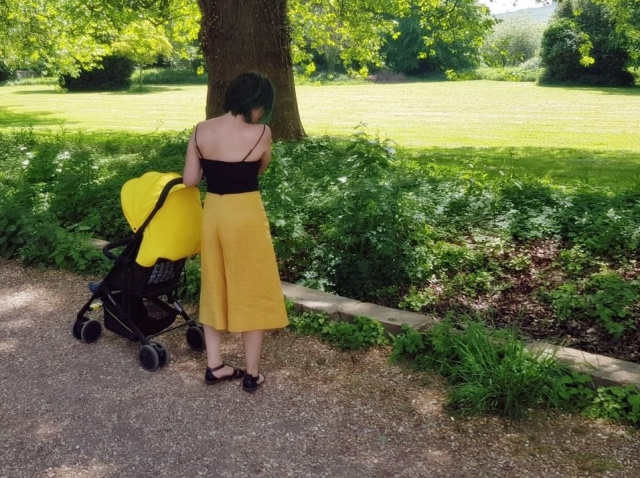
The fabric has a stripe design running along the length which I have used on the button bands, the collar edge, the sleeve cuffs and the pocket top. I would’ve used it on the belt too but I only had 2.5m and the fabric was narrow so I didn’t have enough left to place the belt on a stripe.

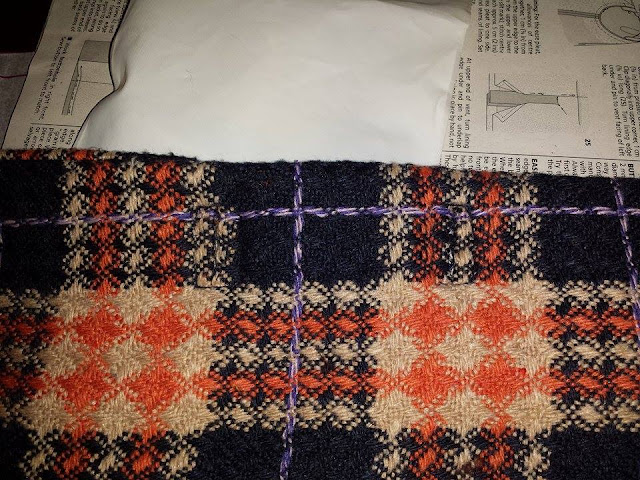
I felt clever and made the buttonholes horizontal. I thought that it makes more sense to have them in the direction the buttons are pulling, but I didn’t think how difficult it would be to make sure the button bands are aligned. The fronts can shift left-right and the underband can be seen, which is very visible with the stripe peeking out.

03

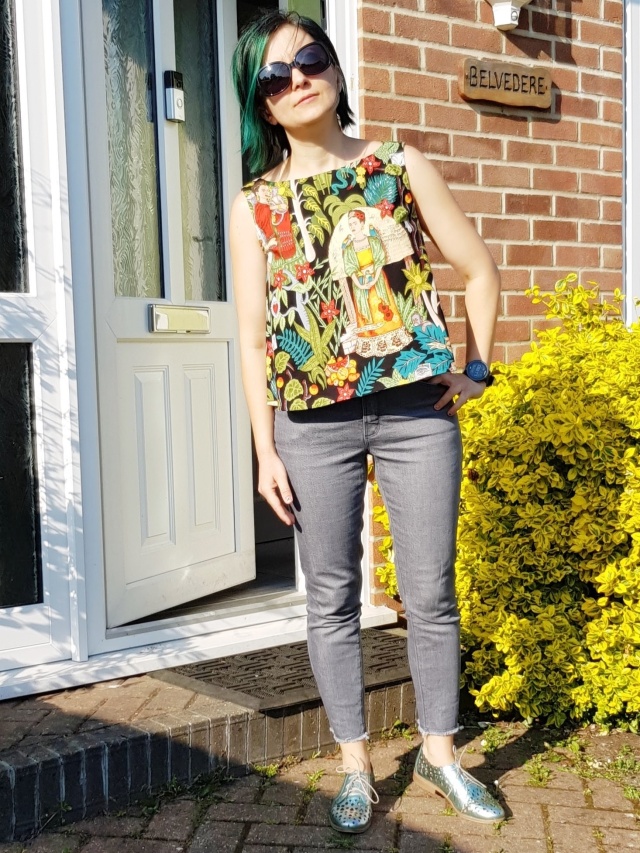
The print reminds me of a tapestry my grandmother had on a wall in the room I used to spend my summers as a child. I’ve asked my aunts for a picture but sadly the tapestry is gone 😦

0331750

The collar stand looks like it’s collapsing. I’ve moved the button 2 times, but I thin maybe the buttonhole should be higher? Do you have any tips for a proudly standing collar stand? 😀

B6178 and Burda 07/2015 #113

A couple of months back Marimekko did a line for Uniqlo and I loved their ‘tent’ tops.


11_408327

I wanted one but the M was too big and the S too small so I decided to make it myself. I got this Frida print from Fabrics Galore and used a Burda tank pattern. I closed the bust darts to get fullness at the hem but I’m not sure this is the right way to do it, most of the fullness is at the sides and the front hangs quite straight. Oh well, good enough.

20180515_081935 (1)20180515_081928IMG_20180515_083212_258

The culottes have been planned for  a while. I used facings instead of waistband (comfort level up!) and left the pockets as my fabric was too heavy and I didn’t have any matching lining.

wp-1526328299315

I made a flat seat adjustment and shortened the crocth by 1/2″. You can read a full review of the pattern on PR.

23

I took them out to beautiful Winchester yesterday.

1

This slideshow requires JavaScript.

Butterick 6385 – A coat for my sister

20171029_074713.jpg

I promised my sister a long time ago that I would make her a winter coat. She  visited for a week at the end of last month and I was prepared – I bought the pattern at the GBSB live event in September and ordered the fabric online right after the event. It’s a wool tweed in denim blue, very soft and snuggly.

We had quite a few days out during her stay, so I only had 3 days to make this for her.

Day 1  – muslin and cutting fabric

Day 2 – fusing interfacing on all pieces and starting sewing. Fusing took soooooo looong, but the fabric was a bit too soft and flimsy, it ended up looking so much better with a light knit interfacing backing.

Day 3 – finished sewing everything, including all hand stitching very late in the day.

Day 4 – ok, some work has been done on the 4th day. All the basting thread had to be taken out, but I was out to #sewbrum so my sister had to do that.

On day 5 my sister was leaving early in the morning, we took  some few quick pictures at the airport. I entered this coat in the Wool Coat contest on Pattern Review. The pictures are not good enough for a competition entry but there was no way I could get some better ones before the deadline.

20171029_074652.jpg20171029_074829.jpg20171029_074848.jpg20171029_074641.jpg20171029_074759.jpg

You can read the fitting/construction details over on Pattern Review.

I need a short break from sewing after the hectic #prsewingbee and making this coat in such a short time. I want to make a few pairs of jeans and some cosy sweatshirts, but I can’t get myself to start yet. I started a new knitting project and I’ll keep busy with that one for a while.

IAM Patterns Artemis

20171029_074939_2.png

I bought the fabric and pattern for this one about  a month ago at the GBSB live. I rarely use a pattern/fabric so soon after buying, but this was quick to make and very seasonally appropriate so I tried really hard not to stash them.

The pattern didn’t really tempt me until I saw a picture of the longer version. It looked really warm and cosy in a nice woolly fabric.

artemis1artemis.png

After getting the pattern I looked for a boiled wool but ended up buying this wool knit, slightly felted, from Doughty’s. The label said 80% wool and it was £15, less than the 100% wool fabrics that went for ~£20/m. I chose this one for the colour, I love bottle green and it’s very easy to wear. The problem is the dye is not properly set and everything it touches gets green. I will try to wash it with some vinegar.

Going back to the pattern – the envelope was tricky to open. It’s a waxed paper on one side, glued to card on the other side. I didn’t find a way to open it nicely so I ripped the paper. I could’ve used the scissors I guess 🙂

Based on the size chart I should’ve went for size 42 but I cut 38 after measuring the pattern. I’m used to wearing more closely fitting clothes,. I’m not yet ready for the full on slouchy trend.

20171027_162727

20171027_162802

20171029_074944

I lengthen the original pattern by 30 cm.  For the front I added 10 cm above the pocket and 20 below. The higher pockets might be aesthetically pleasing, but I think they are more practical lower down so I can actually keep my hands in.

The pattern instructions say you need 3 yards for the short version, the long one isn’t included. I bought 3 meters (3.3 yards) and after making the coat 30 cm longer I have enough left for a knee length skirt. I think they are way too cautious with fabric requirements.

The pattern had a center back seam – maybe for stability, maybe for fabric layout. The instructions show the fabric folded cut sides together, not selvedge to selvedge – not sure why, the pieces would fit either way. My fabric was stable enough so I cut the back on fold so there’s no seam along center back.

The hems are overlocked and folded once to avoid bulk. The instructions ask you to fold twice which would work fine with a lighter fabric.

There was a seam allowance error at step 5 which I think was a typo – asking you to sew 1/8″ instead of 3/8″. It was only in the English version, I scratched my head reading it until I looked at the French version and noticed the difference. I sent a message to the designer so they might update it.

It’s a lovely coat and I’ve been wearing it a lot, I need to make sure I wash it again with some vinegar and only wear it over dark clothes for  a while.

20171029_075102

20171029_075056


I wore it to #sewbrum on Saturday but didn’t take any pictures. In fact, the only pictures I took that day was this one of a wall somewhere close to the train station.

20171028_113454

My shopping list for Saturday was short – sweatshirting and denim. I didn’t buy anything else, but I did get enough sweatshirt knit to last me a few years, all from Guthrie & Ghani. The selvedge denim is from Barry’s and the mustard/gold is from G&G.

20171030_134706.jpg

I was lucky again this year and won a prize in the raffle – a nice selection of crafty bits from Sew Crafty. Those doughnut weights look delicious.

IMG_20171028_214424

I had a great time on Saturday, #sewbrum is a lovely event, I think the way it’s organised  with coffee first, shopping after and then more socialising at Guthrie & Ghani makes it easy to make new sewing friends.

Burda jacket 09-2015-121

The theme for round 3 of Pattern Review Sewing Bee was REVERSIBLE. For me, it had to be a jacket. One that I could wear any day, any time, being reversible meant that I could have a fun side and a more business-casual side.

front

The pattern is a petite one from a few years ago. I recently bought this red neoprene-like fabric thinking it looked a lot like the mesh Burda has used for their version. The wool knit was left over from a Style Arc Violet, I had enough for the body of this jacket.

121-092015-b_large

The most challenging thing about this jacket was finding a zip. I really really wanted a metallic reversible zip and all I could find was plastic. I found a reversible zip puller on eBay and ordered it, but before that one arrived I also visited a few haberdasheries around Soho and found a reversible puller for a No5 YKK in Kleins. When I got home that day the zip puller ordered online was waiting for me. Yep. HUGE!

20171002_130157

I had to take the zip stops out to replace the puller and shorten it by 1 cm. I couldn’t do it. I have to look for some tips online if I ever need to do it again. This time I just cut them off, there was no way I could loosen them up. I was so happy I got a spare pair when I bought the puller.

All the construction details are in my review, but I can only have 5 pictures there, so I’m sharing all of them here 😀

front2

20171003_12461620171003_12473420171003_12524020171003_125513back

Mccalls 7081 and Burda 08/2013 #115

This was my entry for round 2 of PatternReview’s Sewing Bee with the theme ‘Fabulous sleeves’. When the theme was announced I wanted to make McCall’s 7627 but the pattern is only sold in US and Canada. I started looking at pictures of similar tops and I was completely smitten when I discovered the St Barts top from designer Johanna Ortiz.

The striped fabric was essential to the look so I started looking online for striped stretch shirting. I couldn’t find anything that had stretch and stripes wide enough to be visible so I settled on this shirting from Fabworks. It is so tightly woven it has absolutely no give and it almost feels like it’s waterproof. It isn’t, I tried 😀

The fabric arrived on Monday and the deadline was Wednesday so I had only 2 evenings to make this and take pictures on Wednesday. I did make a muslin before that so I knew it was going to fit, I didn’t have to worry about that.

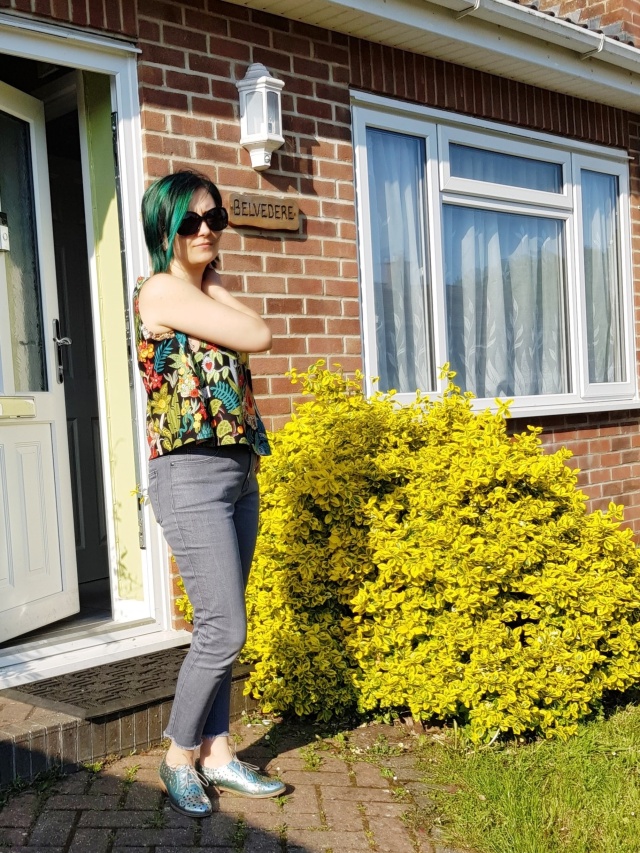
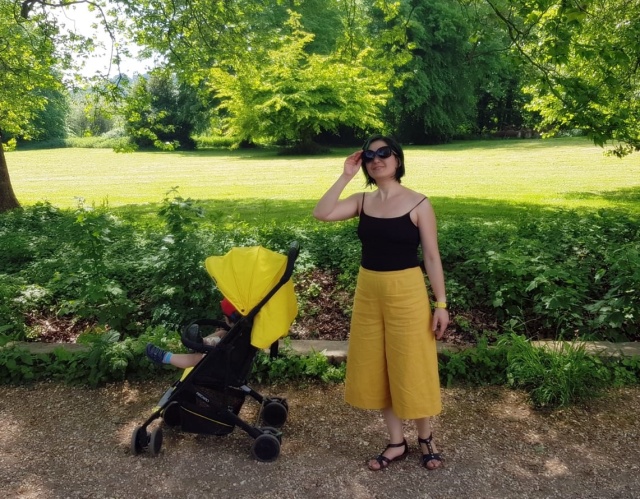
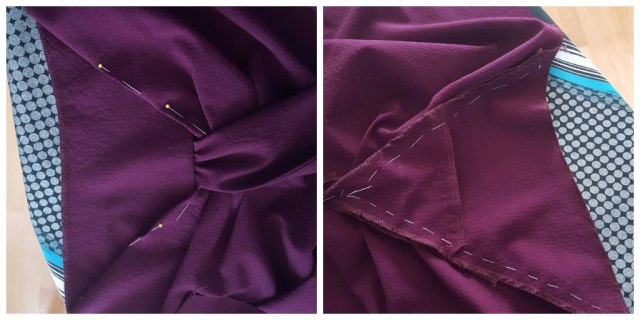
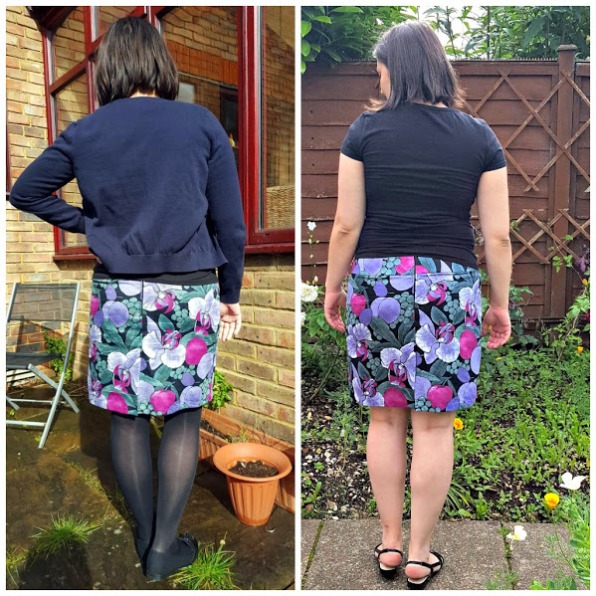
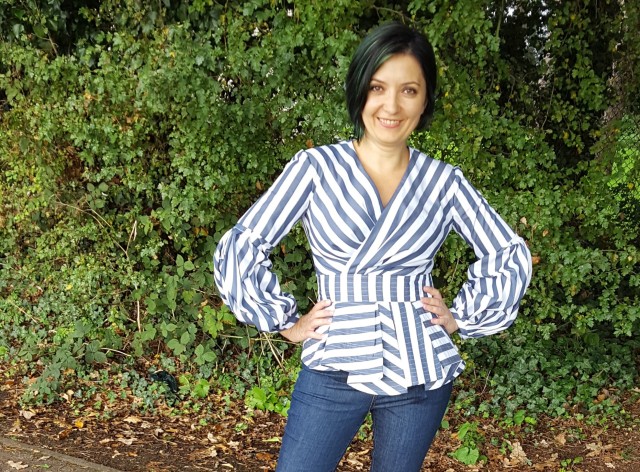
The waistband and peplum are interfaced and topstitched every 3/4 to 1/2 inch so the bottom of the top got a bit rigid and heavy, it feels like putting on a gladiator suit.

My review on PR has the pattern and fitting details. The top is definitely fabulous and I feel fabulous wearing it. Two important questions arise though with sleeves this size:

  1. Can you wear any jackets with this ? What do you do when it’s too cold to wear the top on its own? My answer is the StyleArc Violet jacket.
    20170923_200300
  2. How do you press this monster after the first wash? I don’t know!

Burda 08 2017 119

The 2009 august issue of Burda has been my all time favourite. I’ve used 4 of the patterns in it and there still are a few in my queue – 8(!) years later 😀

This year’s august issue is just as good – I made this dress and plan to make at least 2 more items in the near future – the petite blazer and the cowl jumper.

burda1

I always loved Burda’s puzzle dresses, this one and the other seamed dress in this issue are gorgeous, they really are something else.

backdress

The back is basic

The fabric is a ‘waffle wool’ as described on the Fabworks website, it feels really light and crisp, nothing like any other wool fabrics I’ve seen. The colour is really difficult to photograph, I’d say it’s in between the photos up here, not as cold as on the left but not as warm as on the right, and the photo on the Fabworks website is too dark.

After measuring the pattern I traced size 38 for shoulder, neckline and underarms and pivoted to 42 for bust, waist and skirt., keeping the size 38 length for the bodice. I made a muslin and was happy with the fit, I only shortened the bodice 1 cm above bust and raised the armhole one more cm. I also took off 15 cm off the skirt length.

I have a short torso and I usually shorten the patterns at least one inch above the waist. I think this might be too short on someone above average height.

My armholes ended up too small because I had a 1.5cm allowance there but I used less than 1cm when sewing the binding on. The finish is a bit bulky as well, I think I will go back and bind them with a single fold bias strip.

A few tips for putting this together that are not mentioned in the instructions:

  • I stitched darts and pleats and then overlocked everything but neckline (there’s a facing there), armholes (bias binding) and hem (overlocked all around after front and back are sewn together)
  • Step 3 asks you to baste the dress on top of the side panel on the placement lines and then baste them together following the seam lines.  I did that on my muslin but then decided to only pin the inner edges instead of the first basting, otherwise you can’t baste the seam lines because the placement lines and seam lines are very close together at the sides. This probably sounds very confusing without having the pieces in front of you.

    burda2

    Left: dress on top of the right panel. The dress has the edges folded under and they extend all the way to the edges of the panel. Right: dress and panel seam lines basted

  • After step 3 and 4 I stitched in the ditch along the waist seam to secure the panel and keep it from moving around.
    burda3
  • You might want to interface the zip opening

I didn’t buy the September issue and I don’t think I’ll buy October either, but I have plenty of old issues I want to use. Stay tuned for more Burda goodies! 🙂


McCalls 6996 and Burda 7105 – a resurrection

7 months ago I got a brand new sewing machine with all the bells and whistles, I was ready for SWAP 2016, when sloth took over. I was pregnant, tired and at the end of the day I only had enough energy to move from the sofa to the bed. I took a break until spring when after a couple of maternity sewing failures I stocked up on maternity patterns.

I started with a Burda 7105 skirt which, to my surprise, was a great success.

7105_esb_1

When I saw it I thought the belly band at least would be cut out of something with some stretch. But no, they instruct you to cut the band from the same fabric as the rest of the skirt and the pattern recommends ‘light wools’ and stretch fabric for the trousers only. I was worried the skirt won’t fit for long with a rigid interfaced (!) yoke but 3 months later it still does.

fusta1

March vs June

fusta2

After making the skirt I took another long break until the last couple of weeks. I started with a soft bra which is cut and patiently awaiting to be sewn. I made a pair of Burda mag pyjama shorts (documented on Instagram) and a cardigan. Noting maternity specific, I plan to wear all of them for a long time.

The cardigan is McCalls 6996. It looked pretty relaxed, not in a slouchy way and I thought there’s not much that could go wrong with it. I cut an M and didn’t make any alterations to the pattern.  Looking at the pictures, I shouldn’t have skipped moving the shoulder seam forwards.

The hem is curved so I carefully marked, pressed and hand basted it before sewing. When I saw the picture on the left I couldn’t believe it’s so ripply. But then I realised I forgot to press it after sewing (LOL). Problem solved, now I have a perfectly flat hem!

cardiganspate

BUT I might need to do the hemming again. I think the combination of colour, length and slightly baggy shoulders make this cardigan look very outdated (me being in desperate need of a haircut doesn’t help either). So my next project is to shorten it by 6 inches, that would suit me a lot better.

There’s a month to go until baby arrives and I think I will at least finish the bra until then AND make a summer dress. I will have a couple of weeks off work so I might do even more!

Sewing with a plan

Have of you heard of SWAP? It’s a yearly challenge to sew 11 garments that will all work together. Some years, every top has to match every bottom; other years, the 11 pieces simply have to work together as a collection.

This year the rules are very flexible and I finally feel I can commit to such a big project.

  • 1 “3 pack” of Color(s) A (3 garments)
  • 1 “3 pack” of Color(s) B (3 garments)
  • 1 “Combo Pack” of Colors A & B (2 garments)
  • 1 “3 pack” of Wild Cards

I went through my stash and chose the fabrics and patterns I want to use. This made me realise I have way too many, more that I could sew for several swaps. And I still love most of them so I should stop buying more.

My first pack is full of colours and it’s my favorite.  The shirt fabric is a poly cotton blend, the top will be made in a cotton silk blend and the trousers in cotton sateen.

The second pack doesn’t have any prints and the colours are quieter. Cotton sateen for the trousers, swiss dot cotton for the top and raw silk for the jacket.

The combo pack has prints again – cotton viscose blend for the top and medium weight cotton twill for the jacket. I think the stripes will look nice going in different directions on the lapel. I might add a waist seam and play with the stripes direction.

And the wildcards which are not plain but they will go nicely with the rest of the garments. Two of them are dresses so they can be worn by themselves anyway, but I think the wrap dress will look great with the yellow jacket, and both dresses will go well with this coat. The coat goes with everything, the dots are very small so it doesn’t really look like a print from a distance.

Two garments may be previously sewn, one may be purchased, and two may be sewn up before the official sewing start date of Dec 26, 2015. I already have the denim dress but I didn’t take pictures for a post yet and I want to make at least the wrap dress before Christmas. I want to wear it to my work Christmas party which is on Dec 17.

There are a lot of garments but only a few patterns. I have Simplicity 2599 and Butterick 5678 for the tops, both of them are patterns with different cup sizes so I’m hoping I won’t have a lot of work to do with the fitting. I’m showing two different trousers patterns, an Ottobre and a Burda, but they are very similar and I will only make one. I’m still debating on that, I know that Burda trousers fit me well, but I like more how the Ottobre look on the model.

trousers

Ottobre on the left and Burda on the right

The jacket/coat patterns are very similar so I will probably fit one and use that pattern to alter the other two. I think out of the 3 I will start with the coat, so I can wear it during the spring.

I made the board in PowerPoint and I was surprised to see you can remove the image background after adding it to a slide. I don’t know since when this has been a feature, but I found it very easy to use and you don’t need any photo editing software. Of course, you do need to have Microsoft Office. If not, I recommend Gimp, it’s a powerful free photo editing software. It might take a while to get the hang of it, but there are a lot of tutorials online.

Do you like to make plans? Are you just having fun and sew whatever you feel like? I was on the fun crew but I never have anything to wear so I’m switching gears.

A plaid tailored jacket for PR Sewing Bee round 3

I’m still burnt out after making this in 9 days (mostly evenings), 2 of which were spent on fitting the pattern, but I wanted to share it because I’m extremely proud of it.

There are many details in my PR review so I won’t bore you with more text, even though I could probably write at least 2 lengthy posts about this week.

2 bound buttonholes – one of them is almost invisiblle

Perfectly matching pocket flap

Almost perfectly matching welt

I underlined the bias cut velvet collar with a piece of interfaced light cotton

Insides before lining

Inside out – satin silk lining from the cloth house sale – £4/m

aligned horizontal lines

aligned vertical lines

Could’ve done better on the back

I absolutely love it!

I hope I get through to the final round (will find out tomorrow) and the last challenge is a pair of trousers. I’ve had a gorgeous pair of Burda (again!) jeans on my list for 2 years. 😀