Simplicity 1873+1610 and Vianne – a late oal2015 outfit

I wanted to take part in the OAL this year and I actually managed to finish the cardigan on time but not the dress, which is surprising considering the amount of time needed for each.

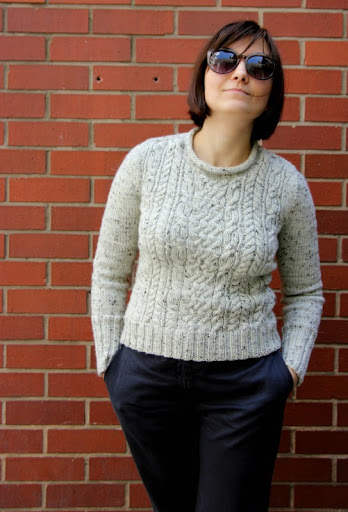
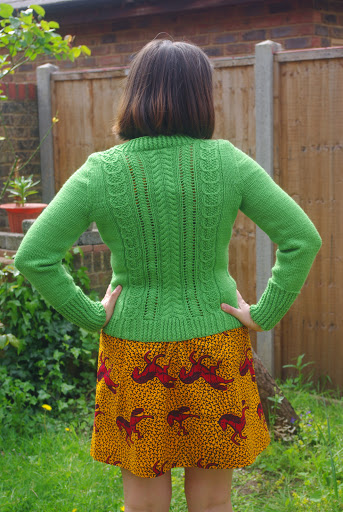
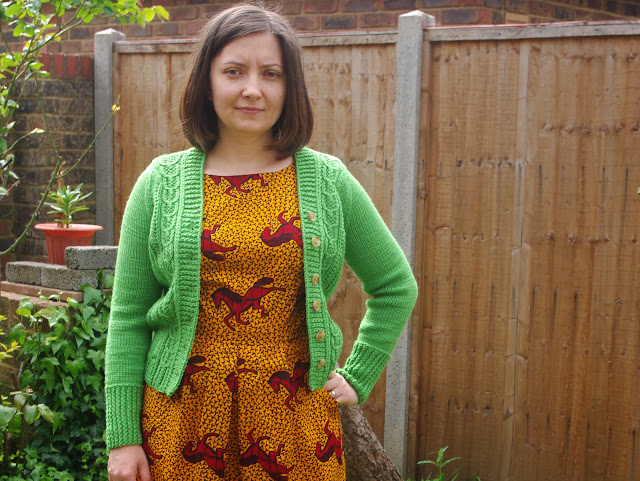
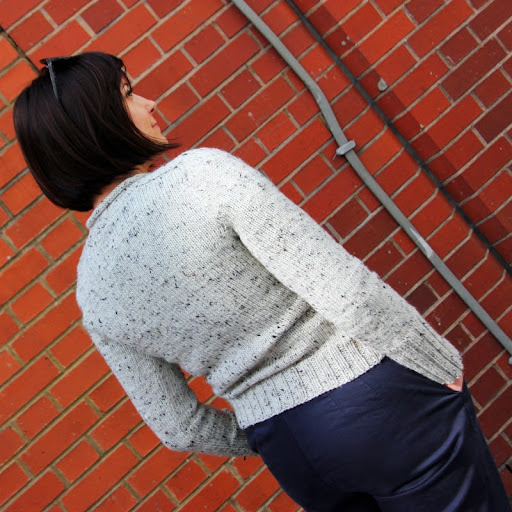
My gauge was spot on for the cardigan, but I made a mistake I no longer make when sewing – I knit it in size M, based on my bust measurement. Therefore the cardigan is big at the shoulders and the sleeves are too wide.

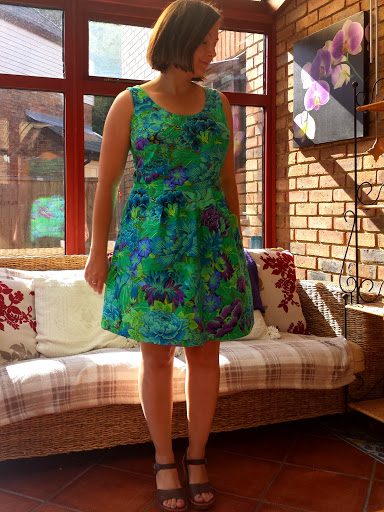
For the dress I used Simplicity 1873 on top and 1610 on the bottom. I’ve made the 1610 dress before and I love that skirt – perfect pockets that stay in place and are better located than in-seam pockets (they look better too imo), plus the width of the skirt feels just right for me.

I don’t love the top though. I tried Nancy Zieman’s pivot an slide method (see video at the end) and started with size 10 based on my front shoulder measurement. I had to add quite a lot of width at the bust and waist and I’m afraid that distorted the overall shape. The top has a lot of ease above and below the bust at the sides, but at least the armhole doesn’t gape. I made a muslin and made a few other changes to the pattern after that – moved the front waist dart a few cm to the side, lowered the bust dart and removed a 1.5cm wedge for sway back. One other alteration I meant to do but somehow forgot was to add length at center front. This is not mentioned in the video but it makes sense to add some space vertically too. I did squeeze a little bit of length by reducing the seam allowance, but that was not enough and I think the proportions are off because of the bodice length. It is just too short.

Modified pattern before muslin

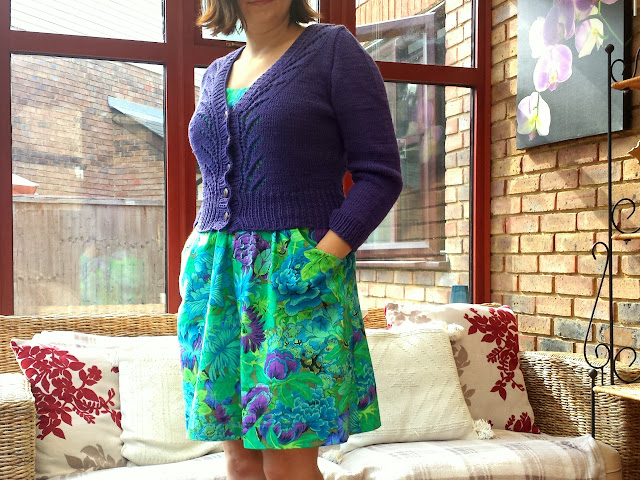
Front view – the too short and boxy bodice is obvious here. And notice the green on green – this is why my other pictures are inside even though it was a beautiful sunny day.

Even though I moaned all through this post, I don’t dislike and the dress and I will continue to wear it. It’s not perfect and I hope all my future projects turn out better than this, but sometimes less than perfect is enough. At least from some angles.


Since I made this I bought Nancy Zieman’s pattern fitting book, I’m not giving up on her method yet. It looks easier than other I’ve seen/tried, I hope I can make it work.

Acorn trail or how I realised that I choose my knit patterns the same way I buy my fabric

The busier the better that is. I like textured knits the same way I’m attracted to prints rather than solid fabrics.

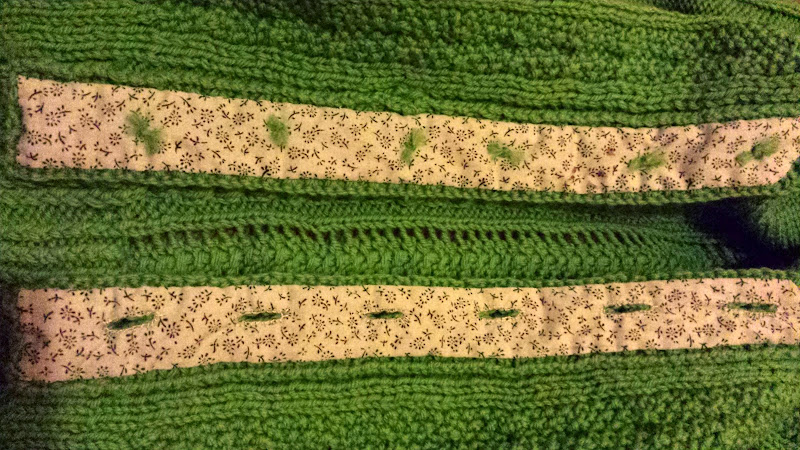
Yes! I have finally finished this one! I started working on it just before the new year and I worked almost two months on it. But only this bank holiday weekend I got around hand sewing the button bands.

I got the horn buttons from Kleins. The salesman was very nice and showed interest in my cardigan. I’m not sure if it was for real or not, but he was friendly and helpful and I ended up buying more items than I intended to. 🙂

The pattern is an Amy Herzog design and I enjoyed making this so much! It looks complicated at first, but I memorised the stitch patterns in no time. I used Cascade 220 (a lucky find on ebay, I still have some left plus another 800g in a deep purple heather) and made a few changes:

  • my gauge was different, I had 17 st/4″ instead of 18, so I knit a size smaller
  • my row gauge was different too so I made the decreases/increases every 6 rows instead of 8
  • I changed the neckline to a V neck as I think it goes better with everything (I find my Miette is really difficult to wear because all my dresses have a high neckline)

For the V neck I started decreasing at the armhole, placing the decreases at the side of the lace pattern. This made the v neck go from the armholes to the center, but seaming the shoulders and blocking gave it the correct shape.

You can still see it a bit when it’s unbuttoned.

But it’s no biggie, I don’t mind it and I’m sure no one will notice. 🙂

Do you have a neater way of sewing buttons on your knits? Do you hide the loose ends somehow?

I will never be cold again – Old Romance and other knits

Old Romance was released in March and as soon as I saw it I wanted to make it. I bought the pattern, but as it usually happens, it got stuck in my knitting queue. Then at the end of July a Joji Fall knit along was announced and I decided to join. The cast on date was August 1st and we had 3 months to finish. That seamed reasonable and indeed I was able to finish on time.

Ignore the squinty  eyes here

I bought the yarn on eBay, it’s a lambswool/silk mix, a little scratchy but not too bad. I can wear this cardigan a whole day without any problem. And it was a bargain at £3/100g. I recently bought some merino from the same shop and it’s very soft and nice.

Following the knit along, I discovered/remembered a few techniques. The first one is one that I used before, but forgot about it – twin stitch short rows, aka shadow wraps – they are invisible. I always had little holes when I used the wrap and turn method.

Next one is Russian grafting technique – joining live stitches with a crochet hook. It’s not invisible like kitchener, it looks like a lovely braid.

And the last one is this extra stretchy, no flare bind off for ribbing, continental (Lori’s twisty bind off). I knit continental, but a different variation than Lori – it’s called Eastern uncrossed. In this variation some stitches sit differently on the needle, like they are twisted. Long story short, I didn’t used this bind off because I was to lazy to “translate” the method from standard continental to Eastern uncrossed, and using it as it was resulted in a very un-stretchy ribbing. But I would like to try it at some point.


And since I was in the knitting fever, I also made two hats – one for me and one for the boy.

no pattern – drops merino baby

Tweedy Dan

I finished knitting this sweater exactly one year after adding the pattern in my favorites on Ravlery on 27/03/2013. 🙂

I started working on it in December last year and after finishing the body and half the cuffs, I just let it sit for a while before I could bring myself to finish the simple stockinette sleeves and sew everything together.

I loved the pattern as soon as I saw it, and it was free at that time! I was a bit afraid of all that cabling, but somehow everything went so well, after a couple of repeats I didn’t need to look at the instructions anymore. I just made a note of all the rows where I needed to do increases, decreases,  center cable left/right, etc.

Some reviews on Ravelry say the pattern is confusing and it could be so if you’re an absolute beginner. I did find it confusing at times, but not so that I couldn’t improvise and trust my “advanced beginner” intuition to sort thing out. The cabling is pretty straight forward, what I thought it’s not clear is whether the increase/decrease rows are included in the repeats. I can live with the decision I made – to add the decrease in the 5th row.

Untitled
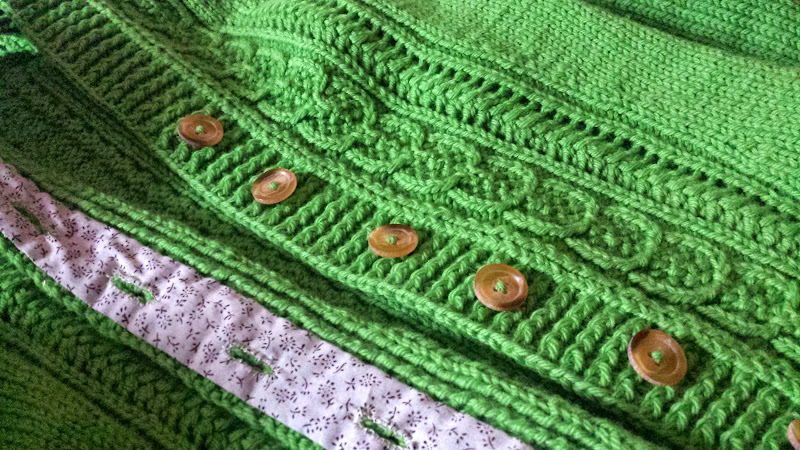
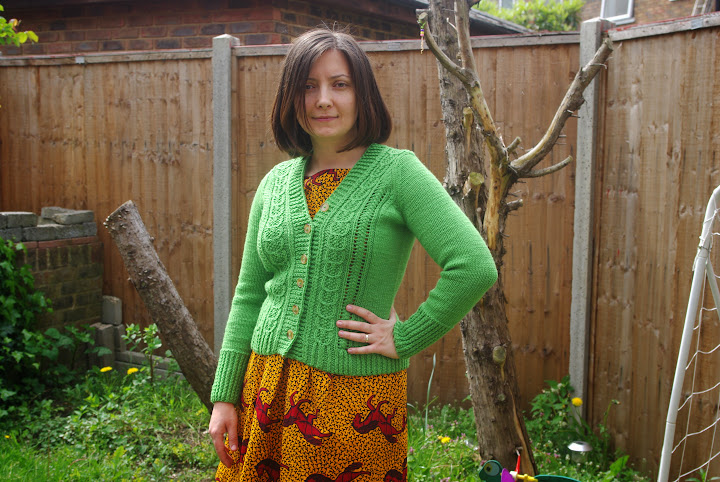
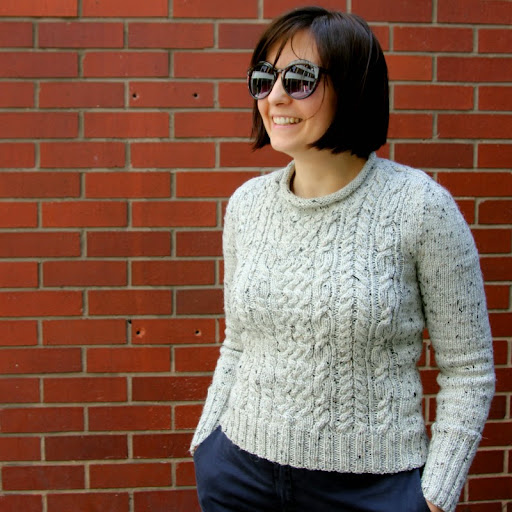
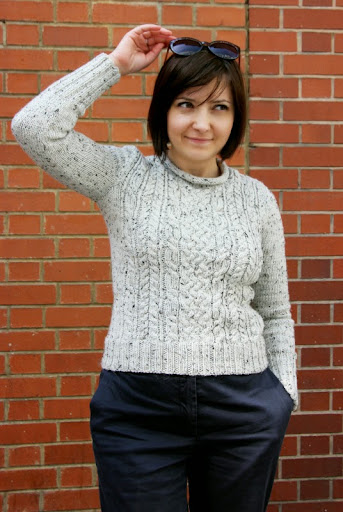
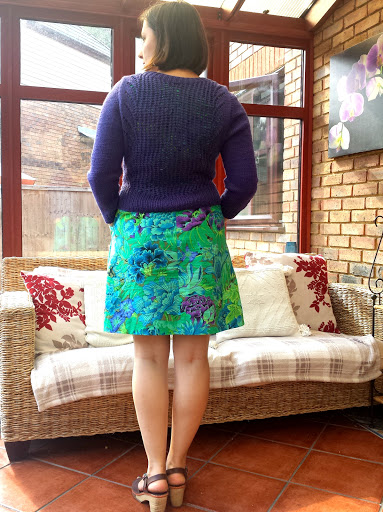
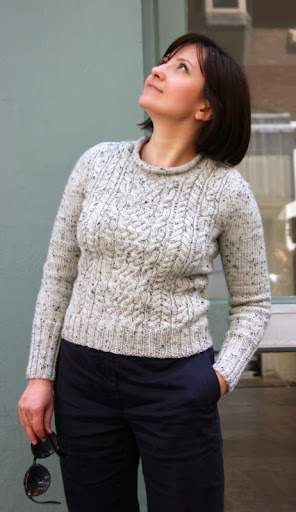
I’m happy with the result, here’s my giraffe pose to prove it 😀

Miette

Did you know that Miette means crumb? I wonder what’s the meaning behind this name. Maybe I should email Andi and ask. 🙂
image

I started knitting this cardigan almost a year ago, after seeing Jo’s beautiful version.
image

I chose a cotton yarn since I wanted something cool for spring and summer. It’s the recommended weight, but I find it a bit bulky. Maybe because cotton is not as elastic as other types of yarn.
image

I made it in size M and moved the bust darts to the side. Should have picked a smaller size, my cardigan has no negative ease.
image
I’m not really happy with the neckline, the ribbing is flimsy, it’s not very elastic. 😦
image
All my dresses have a high neckline and Miette has a scooped one, they don’t work well together. I’m not sure if/when I will wear it so I didn’t bother sewing ribbon on the back of the button bands.

The high school sweater

When I was in highschool my mom made me a simple 2×2 rib sweater in red. My desk colleague who is still a very good friend loved it. When she heard that I can knit she immediately asked for a sweater similar to that one. It’s been over 10 years since we finished high school, so you can imagine how much she liked it.
image

She helped me a lot when I moved to London, so I was kinda owing her something special 😀
I started knitting sometimes in September but then put it away for a while. Then I got the marvelous idea to knit on the train.  I spend half an hour on my way to work and I usually get to seat.
image


I don’t remember why I decided to knit the front and back separately, but I shall never do that again if possible. I knit the sweater to fit me, thinking that since I am shorter and rounder it will fit her too,  because she is taller but slimmer.  When she tried it on though she wasn’t pleased with the length, and that is also my fault for not clarifying in the beginning.  So I had to lengthen it after I sewed front and back together starting from the bottom, obviously. I didn’t have the courage/patience to do it properly so I just picked stitches from the bottom and knitted for another 10 cm. That’s 4 inches for those of you who prefer the wrong measuring system 😀

image

It’s not that evident from more than a feet away 😀

It’s the first time I picked stitches for the sleeves but I will use this technique again. It’s nice to skip seaming once in a while. That’s not the case for the sweater I’m working on now, I am knitting the sleeves flat, so there will be a lot of sewing.

image

This still have to take pictures of my Miette, now that I have a skirt to wear it with.

Larissa – free bikini top crochet pattern

Vineri seara am primit un mail de la o persoana necunoscuta care imi cerea sa ii permit sa descarce un fisier incarcat de mine pe Google docs.

Era vorba despre modelul asta de sutien crosetat pe care l-am “creat” acum aproape 3 ani si de care uitasem complet. Bineinteles ca i-am permis, oricum il pusesem ca tipar gratuit pe Ravlery, si vad acum ca alte persoane l-au si folosit.

Multa lume ajunge pe blogul meu cautand scheme si modele de crosetat, asa ca am sa-l pun si aici, poate va folosi cuiva 🙂

Cupa iese mai mult plata decat adanca. Daca vreti o cupa mai adanca, faceti doar 3dc in loc de 5dc in mijloc.

Guler pentru o printesa

Ieri a fost ziua unei fetite la gradinita lui Sebi. Cand cineva isi sarbatoreste ziua la gradi, este proclamat print sau printesa in ziua respectiva, iar colegii sunt incurajati sa aduca cadouri facute de ei.

Noi am facut acest guler crosetat, iar brosa floare e facuta tot de mine, dar acum mai multa vreme.

guler crosetat

Spun noi, pentru ca m-a ajutat si Sebi. A luat croseta in mana si a inceput sa intepe ghemul cu o pasiune, ca nu stiu cum as fi reusit fara el 🙂

Nasturele folosit e din comoara mostenita de la bunica sotului. Erau 5 cusuti pe un carton, acum mai sunt 4 🙂

Modelul gulerului este explicat aici. Sunt folositi termeni britanici, nu americani, deci treble e de fapt double crochet. In caz ca ati invatat sa crosetati de pe youtube (ca mine), sigur sunteti obisnuite cu termenii americani :). In romana cred ca e piciorus inalt. Pe o schema ar fi reprezentat ca un T taiat cu o singura linie.

guler crosetat

Multa lume ajunge pe blogul meu cautand “lucruri crosetate”, si “masina de crosetat”. DA, exista masini de crosetat, dar functiile lor sunt limitate. Husqvarna are o masina care face aceste patrate:


Din cate stiu eu, hainele crosetate sau partial crosetate pe care le vedeti in magazine sunt crosetate de mana cuiva, nu de masini industriale.

Atelier de crosetat la Incubator107

Incubator107 este locul în care oricine poate învăța pe oricine orice. Suna fain, nu? Asa am zis si eu, si am vrut sa ma implic. Din tot ce stiu sa fac, crosetatul cred ca e cel mai simplu de invatat. Daca vrei sa inveti si tu, atelierul se va tine la ceainarie si te poti inscrie aici. Arunca o privire pe calendarul lunii ianuarie, poate mai gasesti ceva care te atrage 🙂

Cel mai mult mi-ar placea sa tin un atelier de croitorie, dar e nevoie de prea multe resurse, cum ar fi multe masini de cusut.

Asaaaa. Crosetat. La ce te gandesti cand auzi citesti cuvantul asta? Continue reading